Bring Spring Inside: A Beginner's Guide to Creating 3D Layered Home Decor with SVG Files
There is a unique magic in the transition from winter to spring. As the days grow longer and the world outside begins to bloom, many of us feel an instinctive urge to refresh our living spaces. We want our homes to reflect that renewed energy, warmth, and vibrancy. While buying new decor is an option, there is a growing movement toward DIY home decoration that allows creators to infuse their personal touch into every corner of their house. One of the most captivating trends in this space is the creation of Spring Front Home 3D Light Boxes. These intricate pieces combine the art of paper cutting with modern digital design to create stunning, multi-layered displays that make any room feel extra cozy.
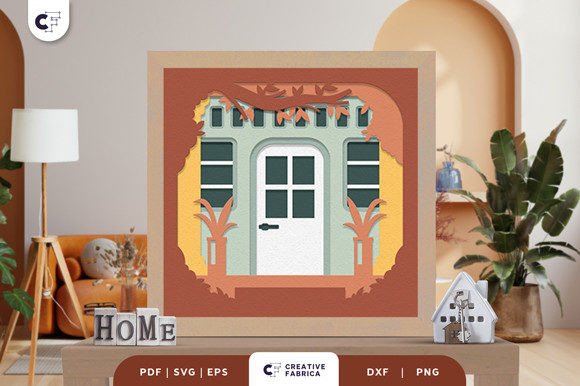
If you have ever admired those shadow box displays where a scene seems to leap off the wall, you have likely wondered how they are made. The secret often lies in 3D SVG files. Specifically, the "Front Home in Spring" design has become a favorite among crafters. This project transforms flat sheets of paper into a dimensional masterpiece featuring geometrical graphics and a welcoming large door that symbolizes comfort and sanctuary. Whether you are a seasoned crafter with a studio full of tools or a beginner looking for your first meaningful project, understanding how these layers come together can open up a world of creative possibilities.
Understanding the Art of 3D Paper Layering
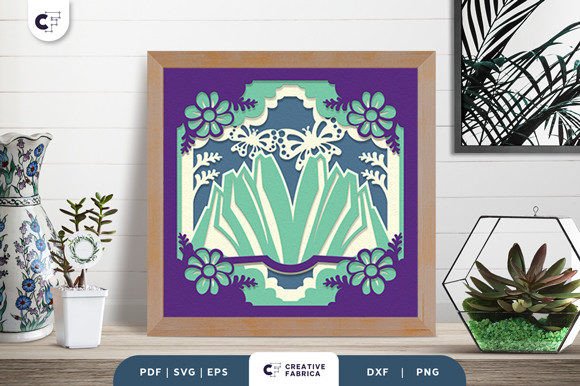
At its core, a 3D paper light box is an exercise in depth and perspective. Unlike traditional flat artwork, these designs rely on stacking multiple layers of material to create shadows and highlights. The Spring Front Home 3D SVG typically consists of eight distinct layers. Each layer represents a different plane of the image, from the foreground elements like flowers or fence posts to the background sky or distant trees.
The beauty of this specific design is its balance between complexity and accessibility. While the final result looks complicated and highly detailed, the individual components are constructed using simple geometrical graphics. This means that even if you are new to vector design or paper crafting, the shapes are manageable. The "complicated" look is an illusion created by the precise alignment of these simple shapes. When light passes through the gaps between the layers, it casts soft shadows that give the house, the door, and the surrounding spring foliage a lifelike quality. This interplay of light and paper is what makes the decoration feel so warm and inviting.
Why Choose a Digital SVG Format?
In the past, creating such a design would require hand-drawing every single layer, measuring spacing manually, and hoping for symmetry. Today, technology has democratized this art form through SVG (Scalable Vector Graphics) files. An SVG is not just an image; it is a set of mathematical instructions that tell a cutting machine exactly where to cut. This ensures that every curve of the roof and every petal of the spring flowers is identical across all layers.
When you purchase a design like the Front Home in Spring 3D SVG, you are usually receiving a package compatible with various software and hardware. These files commonly come in multiple formats to ensure versatility:
- SVG: Ideal for web use and cutting machines like Cricut or Silhouette.
- PDF: Perfect for printing directly onto paper if you prefer hand-cutting with scissors or an X-Acto knife.
- EPS: A professional format used by graphic designers in Adobe Illustrator.
- PNG: Useful for previewing the design or using in digital mockups.
- DXF: Often used for compatibility with older cutting software or CAD programs.
This flexibility means that regardless of your preferred workflow, you can bring this project to life. The standard size for many of these projects is around 20.32 × 20.32 cm (approximately 8x8 inches), which fits perfectly into standard shadow box frames found at most craft stores.
Gathering Your Tools and Materials
One of the most appealing aspects of this DIY project is that it does not require an industrial workshop. You can construct this wonder of springtime with a few simple tools found in a typical home crafting kit. To get started on your DIY project, here is what you will need:
- A Cutting Machine: While you can cut by hand, a machine like a Cricut or Silhouette makes the process significantly easier and more precise, especially for the intricate inner details of the geometrical graphics.
- Cardstock: The quality of your paper matters immensely for 3D effects. For the best results, it is recommended to use heavy-weight cardstock, such as Encore Cardstock 80 lb cover (216 gsm). This weight is sturdy enough to hold its shape without warping but thin enough to allow light to pass through effectively. You can explore options at a 12×12 Cardstock Shop to find the perfect colors for your spring theme.
- Adhesives: You will need tape or glue to attach each piece of paper. Foam adhesive squares are particularly useful here as they create the physical space between layers, enhancing the 3D effect.
- A Base Frame: A deep shadow box frame made of wood or foam is essential. This acts as the container for your layers and protects the delicate paper art.
The Assembly Process: From Flat to Fabulous
Once you have your materials ready, the construction process becomes a meditative activity. You begin by cutting out all eight layers using your chosen method. It is crucial to keep the layers organized, perhaps numbering them from back to front. The "large door" featured in the center of the design serves as the focal point, representing a comfortable home. As you stack the layers, starting with the background and moving forward, you will watch the scene emerge.
Pay close attention to the spacing. Using foam tape between each layer ensures that light can travel through the box, illuminating the different depths. If the layers are too close together, the shadow effect is lost; if they are too far apart, the image may lose cohesion. The goal is to create a harmonious flow that draws the eye inward toward the cozy home depicted in the center.
The Significance of Home Decor in Modern Life
Why do we spend time creating these intricate pieces? In our fast-paced, digital-heavy lives, there is a profound psychological benefit to engaging in tactile, creative work. Crafting a 3D light box is not just about making something pretty; it is about mindfulness. The focus required to align eight layers of paper forces you to slow down and be present. Furthermore, displaying a handmade item that reflects the season—like a vibrant spring scene—can boost mood and reduce stress.
Moreover, these projects fit seamlessly into modern interior design trends that favor personalized, artisanal touches over mass-produced goods. A 3D paper light box adds texture and warmth to a room in a way that a flat poster cannot. It becomes a conversation starter and a testament to the creator's skill and patience.
Common Misunderstandings and Tips for Success
Beginners often assume that 3D paper crafting is too difficult or expensive. However, as demonstrated by the Front Home in Spring design, the complexity is managed by the digital file, leaving the user to focus on assembly. Another common misconception is regarding color accuracy. Please note that images shown online are for preview purposes only. The actual final product color may slightly vary due to lighting sources in your home and the specific batch of paper color you choose. This variation is not a flaw but a feature of handmade art; it means your piece is truly one-of-a-kind.
Lighting is another critical factor. To maximize the "cozy" effect, consider placing your finished light box near a window where natural sunlight can filter through during the day, or install a small LED strip inside the frame for a glowing nightlight effect. The geometrical graphics will cast fascinating patterns on your walls when illuminated.
Conclusion: Embrace the Creativity of Spring
Creating a Spring Front Home 3D Light Box is more than just a craft project; it is an invitation to welcome the spirit of spring into your home permanently. With just a few sheets of high-quality cardstock, some basic tools, and a digital SVG file, you can construct a piece of art that exudes warmth and comfort. The process bridges the gap between technology and traditional handcrafting, offering a satisfying experience for creators of all skill levels.
Whether you are looking to decorate your own sanctuary or create a heartfelt gift for a loved one, this project offers endless possibilities. By understanding the layers, choosing the right materials like 80 lb cover cardstock, and appreciating the interplay of light and shadow, you transform simple paper into a window of wonder. So, gather your cutting machine, select your favorite pastel hues, and start building your own slice of springtime today. Your home deserves that extra touch of coziness that only handmade art can provide.