Creating a Stunning Bride and Groom Wedding 3D Light Box for Your Special Day
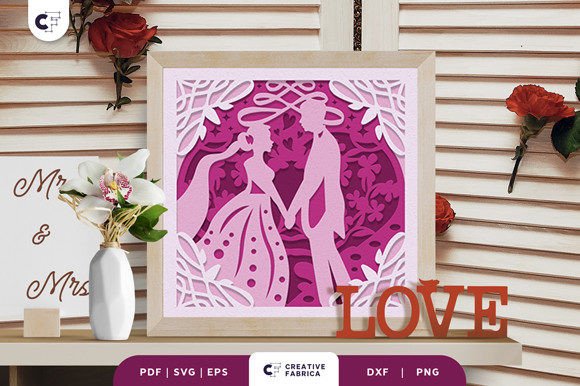
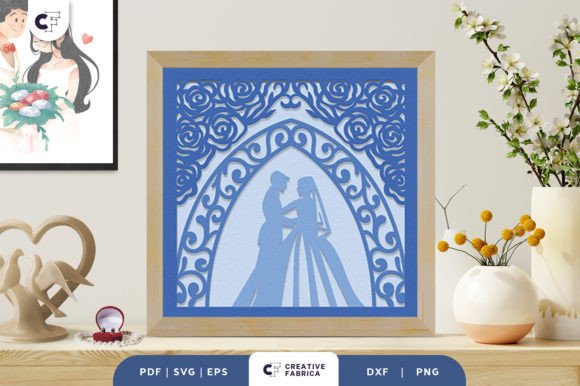
There is something undeniably magical about capturing the essence of a wedding ceremony in a tangible, glowing piece of art. The Bride and Groom Wedding 3D Light Box perfectly embodies a beautiful moment, freezing time in a way that photographs alone cannot. This Rose Wedding Ceremonial 3D Shadow Box comes up with an intricate design of blooming roses that bring a touch of elegance and romance to any wedding ceremony or home display. However, transforming a digital file into a physical masterpiece requires more than just enthusiasm; it demands attention to detail, the right materials, and an understanding of how light interacts with paper.
Many creators, from hobbyists to small business owners, are drawn to these projects because they offer a unique blend of traditional crafting and modern technology. Each layer of this Roses Wedding Ceremonial 3D Shadow Box creates a beautiful visual effect, casting mesmerizing shadows that change depending on the light source. Yet, without proper preparation, even the most beautiful design can fall flat. Let's explore how to navigate the creation process effectively, avoiding common pitfalls that often lead to wasted materials and disappointing results.
Understanding the Design and Layering Dynamics
Before you even power up your machine, it is crucial to understand what you are working with. This specific project features four distinct layers, sized at 20.32×20.32 cm. A frequent mistake beginners make is treating these layers as independent cutouts rather than parts of a cohesive whole. When layers are not aligned perfectly or spaced incorrectly, the depth perception—the very heart of a 3D shadow box—is lost. The result is a flat image that fails to utilize the "mesmerizing shadows" the design promises.
To avoid this, always dry-fit your layers before applying any adhesive. Place them one by one over your light source to check the shadow cast. You might find that certain areas need slightly thicker spacers to allow light to penetrate deeper into the design, enhancing the silhouette of the bride and groom against the blooming roses. Remember, the goal is depth; if the layers are too close together, the shadow effect diminishes significantly.
Selecting the Right Materials for Durability and Light
The choice of paper is perhaps the most critical decision you will make. A common misunderstanding is that any cardstock will suffice. In reality, the weight and texture of the paper dictate both the structural integrity of the box and the quality of the light diffusion. If the paper is too thin, it may warp under the heat of an LED light or fail to hold its shape when glued. Conversely, if it is too thick, it might block too much light, resulting in a dark, muddy appearance rather than a soft glow.
For this project, all cardstock featured is Encore Cardstock 80 lb cover 216 gsm. This specific weight offers an ideal balance: it is sturdy enough to maintain the 3D structure without buckling, yet translucent enough to allow a warm, inviting glow to pass through. Using a lighter weight paper might save you a few dollars initially, but it often leads to a flimsy final product that lacks the professional finish expected of wedding decor. If you are sourcing your own materials, look for papers with similar specifications to ensure your Bride and Groom Wedding 3D Light Box stands the test of time.
You can find high-quality options suited for this project by visiting the 12×12 Cardstock Shop. This is a paid link at no extra cost to you, and it ensures you are getting materials tested for compatibility with intricate cutting designs.
Precision in Cutting and Assembly
Even with the perfect file formats—SVG, PDF, EPS, PNG, and DXF—the execution depends heavily on your machine settings. A prevalent issue among crafters is using dull blades or incorrect pressure settings on their digital cutting machines. This leads to ragged edges or incomplete cuts, which are particularly noticeable in intricate designs like blooming roses. These imperfections disrupt the clean lines necessary for sharp shadow casting.
Always perform a test cut on a scrap piece of your chosen cardstock before committing to the full design. Check for weeding ease; if the tiny details of the rose petals tear away during weeding, your pressure is likely too high or your blade is dull. Furthermore, when assembling, the type of glue matters. Standard white glue can cause paper to warp as it dries, distorting the layers. Instead, opt for a fast-drying craft glue or double-sided tape specifically designed for paper crafts. Apply adhesive sparingly to the contact points to prevent seepage, which can create unsightly stains visible when the light is turned on.
Managing Expectations Regarding Color and Lighting
One area where disappointment often arises is color variation. It is important to note that the images provided in digital listings are for preview purposes only. The final product color may vary slightly due to lighting sources and the paper color you select. Many buyers expect the physical item to match the screen representation exactly, but screens emit light while paper reflects it. This fundamental difference means colors will always appear different in person.
To mitigate this, consider the environment where the light box will be displayed. Will it be lit by warm white LEDs, cool daylight bulbs, or natural sunlight? Each light source alters the perceived color of the cardstock. For a romantic wedding atmosphere, warm white LEDs usually complement the reds and pinks of the rose design best, enhancing the cozy, intimate feel. Experiment with different bulbs before finalizing your assembly to ensure the mood matches your vision.
Final Checks Before Completion
Before sealing your Bride and Groom Wedding 3D Light Box, take a moment to inspect every layer for dust, stray glue strings, or misaligned cuts. Once the box is closed, fixing these issues becomes nearly impossible without damaging the structure. Additionally, ensure your light source is secure and does not generate excessive heat, which could be a fire hazard if left unattended for long periods. LED strips or puck lights are generally safer and more energy-efficient than traditional bulbs.
By paying attention to these details, you transform a simple craft kit into a cherished keepsake. Whether you are creating this for your own wedding, as a gift for a couple, or as a product for your small business, the effort put into material selection and precise assembly pays off in the final presentation. Get yours today and add a touch of elegance and romance to your home decor, confident that you have built something truly special.
Remember, the beauty of this project lies not just in the design itself, but in the care taken to bring it to life. With the right approach, your Bride and Groom Wedding 3D Light Box will serve as a luminous reminder of love and celebration for years to come.